
Hello friends !!! This is a special collaborative video between various youtube channels. The proposed theme is project with audio. The project I propose is to make a prototype that can help non-seers. It has two modes of operation, one that is activated with a switch, which depending on the distance will generate a more continuous or discontinuous tone. The other mode of operation is by means of a voice audio, which will tell us with a voice at the distance determined by the ultrasonic sensor.
You may be interested in projects in Arduino, pic, robotics, telecommunications, subscribe http://www.youtube.com/user/carlosvolt?sub_confirmation=1 videos with full source code and diagrams

Materials
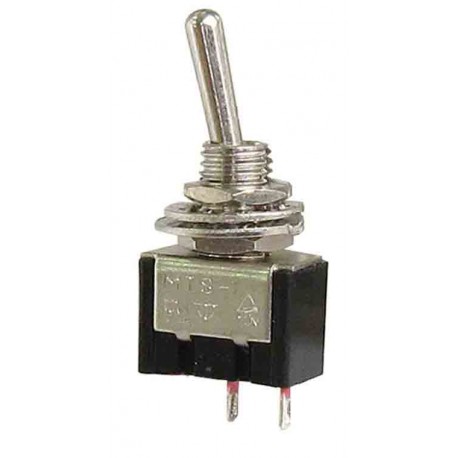
Switch: Device to open or close the electric current passage in a circuit. With the vamos you have enabled or disabled the continuous tone mode.
Arduino nano: On this board we will upload the necessary code for the control of the whole project. It will also be responsible for feeding the whole project with 5 volts.

Electrolytic capacitor: It is connected between pin 9 of the Arduino and the speaker, has polarity, so we must take into account when mounting. The recommended value is between 10 to 100 uF x 16 volts.

Pushbutton: When priced it will generate an audio with a human vos, indicating the distance in centimeters, which determined the distance sensor.

Ultrasonic sensor: The mode is an HC-SRo4, a module very common in home projects.

Micro SD memory: Here we will save the audio files in wav format after the conversion of the files, to suit our project

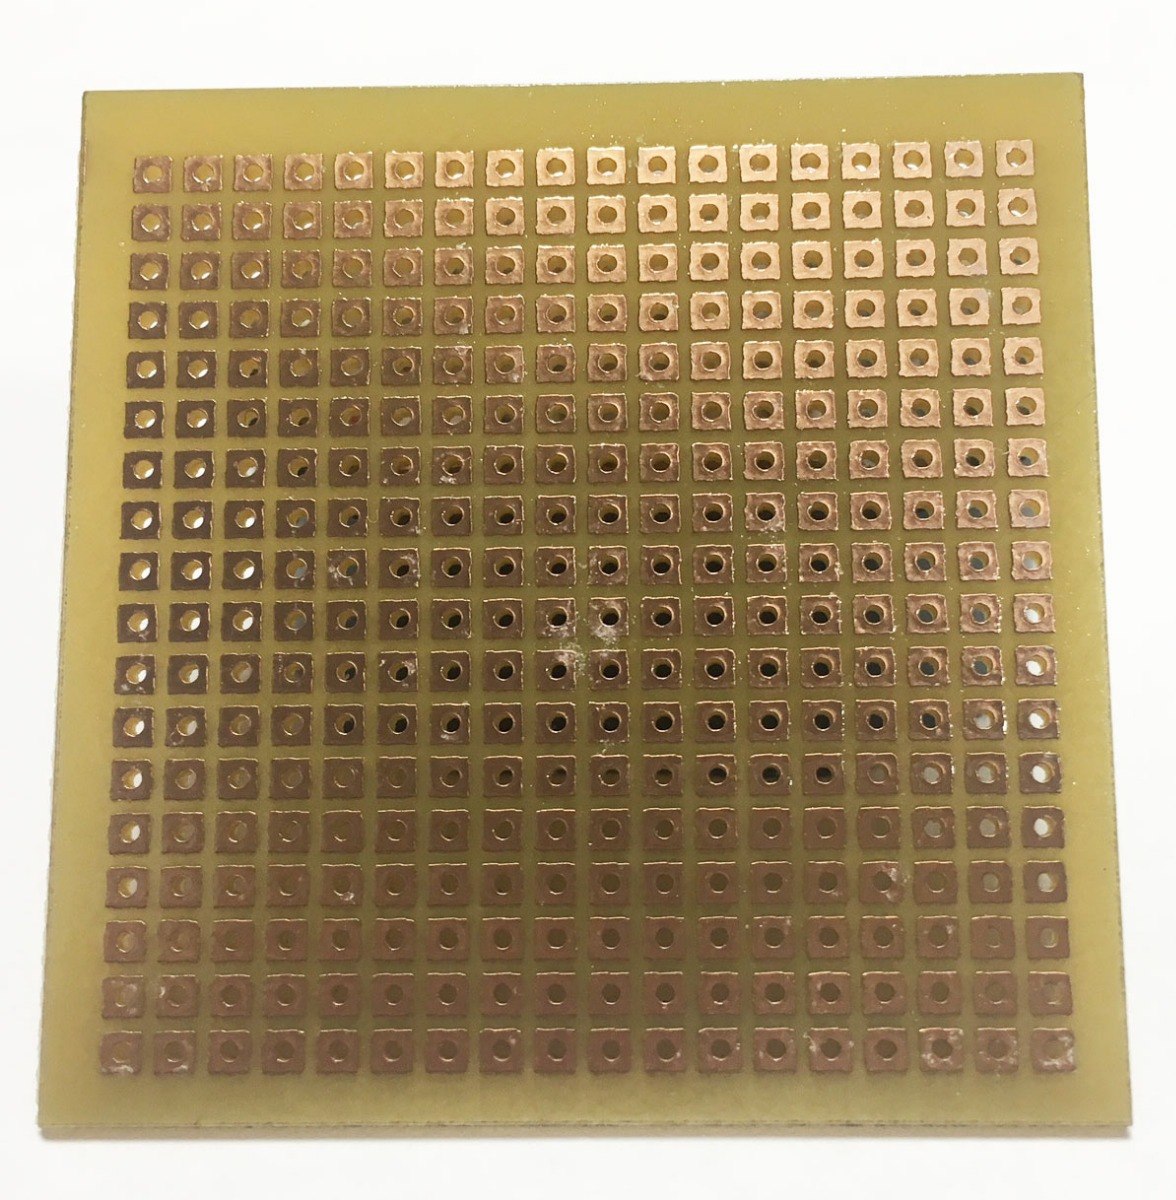
Experimental platelet: This type of board is ideal for making new projects, where we can pack a circuit before taking it to a much better quality printed circuit board.
Micro SD reader module: This module allows us to make an interface write or read files, in the developed project, it makes interface of reading the audio files, with the Arduino and the micro sd card.

Resistor: We will need 2 10Kohm resistors that will go on the switch and pushbutton.

Circuit
The whole circuit works with 5 volts, to get this voltage we connect the Arduino to a usb cable.
The HC-SR04 module is an ultrasonic sensor, which generates ultrasonic sound for a short time (about 10uS) by applying a pulse of that time on the “trigger” pin. This ultrasonic sound bounces off an object and is received by the “eco” pin, the delay time, between that transmission and reception will determine the distance at which an object is located such as a wall.
The trigger pin is connected to pin number 8 of the Arduino, while the echo pin goes to pin 7.
This circuit has two modes of operation, one is the continuous mode where we will hear that a tone will vary depending on the distance at which the object is, this mode is selected with the switch, the pin used for the switch is 3 in the Arduino.
The other mode of operation is voice mode, where a pushbutton when activated will play us an audio with the distance to which the object is, I chose to use pin 2 on the Arduino to connect the pushbutton.
To be able to read the audio files we will need a micro SD card reader module, which allows us to read the files stored on the micro SD card, these files are in wav format.
The speaker is optional, I would recommend placing a headset instead of the speaker.
In the Arduino one we will upload all the programming, it is the brain of the project that will process, all the user’s orders, process information generated by the modules.

Library
Source
|
1 2 3 4 5 6 7 8 9 10 11 12 13 14 15 16 17 18 19 20 21 22 23 24 25 26 27 28 29 30 31 32 33 34 35 36 37 38 39 40 41 42 43 44 45 46 47 48 49 50 51 52 53 54 55 56 57 58 59 60 61 62 63 64 65 66 67 68 69 70 71 72 73 74 75 76 77 78 79 80 81 82 83 84 85 86 87 88 89 90 91 92 93 94 95 96 97 98 99 100 101 102 103 104 105 106 107 108 109 110 111 112 113 114 115 116 117 118 119 120 121 122 123 124 125 126 127 128 129 130 131 132 133 134 135 136 137 138 139 140 141 142 143 144 145 146 147 148 149 150 151 152 153 154 155 156 157 158 159 160 161 162 163 164 165 166 167 168 169 170 171 172 173 174 175 176 177 178 179 180 181 182 183 184 185 186 187 188 189 190 191 192 193 194 195 196 197 198 199 200 201 202 203 204 205 206 207 208 209 210 211 212 213 214 215 216 217 218 219 220 221 222 223 224 225 226 227 228 229 230 231 232 233 234 235 236 237 238 239 240 241 242 243 244 245 246 247 248 249 250 251 252 253 254 255 256 257 258 259 260 261 262 263 264 265 266 267 268 269 270 271 272 273 274 275 276 277 278 279 280 281 282 283 284 285 286 287 288 289 290 291 292 293 294 295 296 297 298 299 300 301 302 303 304 305 306 307 308 309 310 311 312 313 314 315 316 317 318 319 320 321 322 323 324 325 326 327 328 329 330 331 332 333 334 335 336 337 338 339 340 341 342 343 344 345 346 347 348 349 350 351 352 353 354 355 356 357 358 359 360 361 362 363 364 365 366 367 368 369 370 371 372 373 374 375 376 377 378 379 380 381 382 383 384 385 386 387 388 389 390 391 392 393 394 395 396 397 398 399 400 401 402 403 404 405 406 407 408 409 410 411 412 413 414 415 416 417 418 419 420 421 422 423 424 425 426 427 428 429 430 431 432 433 434 435 436 437 438 439 440 441 442 443 444 445 446 447 448 449 450 451 452 453 454 455 |
//Constantes y variables usadas durante el programa #include <SimpleSDAudio.h> #define eco 7 // Pin Eco #define Trigger 8 // Pin Trigger //declaración de variables const int boton1 = 2; const int boton2 = 3; int buttonState1 = 0; int buttonState2 = 0; long duracion, distancia; // Duracion para calcular la distancia int conteo=0; int cent=0; void setup(void) { Serial.begin (115200);//Velocidad del puerto serial // SdPlay.setSDCSPin(10); // Habilitar SÓLO si su tarjeta SD no está en el pin número 4 SdPlay.init(SSDA_MODE_HALFRATE | SSDA_MODE_MONO | SSDA_MODE_AUTOWORKER); pinMode(boton2, INPUT); //Boton pinMode(9, OUTPUT); // Fija el pin 9 como salida. pinMode(boton1, INPUT); pinMode(Trigger, OUTPUT);//Pin TRigger como salida pinMode(eco, INPUT);//Pin eco como entrada delay(500); } void loop() { buttonState1 = digitalRead(boton1); buttonState2 = digitalRead(boton2); if(buttonState2 == HIGH){ tonoDistancia(); } if(buttonState1 == LOW){ CalculoDistacia(); //Llama a la funcion CalculoDistancia } } void CalculoDistacia(){ // Esta función determina la distacia de un objeto con el sensor ultra sónico //while(conteo!=50){ digitalWrite(Trigger, LOW); delayMicroseconds(4); digitalWrite(Trigger, HIGH);//A través del pin de disparo (Trigger) enviaremos una señal de activación al sensor, lo activaremos durante 10 microsegundos y lo desactivaremos delayMicroseconds(10); digitalWrite(Trigger, LOW); duracion = pulseIn(eco, HIGH); //cent = duracion/58.2; //Calcula la distancia en centimetros basado en la velocidad del sonido. distancia = duracion * 10 / 292/ 2; //Serial.println(distancia);//Imprime ese valor en el puerto serial delay(60); // distancia=distancia + cent; // conteo=conteo + 1; // Serial.print("conteo:"); // Serial.println(conteo); // } // distancia=distancia/50; Serial.println(distancia);//Imprime ese valor en el puerto serial conteo=0; buttonState1=HIGH; if(distancia == 300){ trescientos(); cms(); } if(distancia>300){ rango(); } if(distancia >= 200 && distancia <= 299){ distancia=distancia-200; doscientos(); } if(distancia>=100 && distancia <=199){ if(distancia!=100){ ciento(); } if(distancia==100){ cien(); } distancia=distancia-100; Serial.println(distancia); } if(distancia>=90 && distancia <=99){ if(distancia!=90){ noventa(); y(); } if(distancia==90){ noventa(); cms(); } distancia=distancia-90; Serial.println(distancia); } if(distancia>=80 && distancia <=89){ if(distancia!=80){ ochenta(); y(); } if(distancia==80){ ochenta(); cms(); } distancia=distancia-80; Serial.println(distancia); } if(distancia>=70 && distancia <=79){ if(distancia!=70){ setenta(); y(); } if(distancia==70){ setenta(); cms(); } distancia=distancia-70; Serial.println(distancia); } if(distancia>=60 && distancia <=69){ if(distancia!=60){ sesenta(); y(); } if(distancia==60){ sesenta(); cms(); } distancia=distancia-60; Serial.println(distancia); } if(distancia>=50 && distancia <=59){ if(distancia!=50){ cincuenta(); y(); } if(distancia==50){ cincuenta(); cms(); } distancia=distancia-50; Serial.println(distancia); } if(distancia>=40 && distancia <=49){ if(distancia!=40){ cuarenta(); y(); } if(distancia==40){ cuarenta(); cms(); } distancia=distancia-40; Serial.println(distancia); } if(distancia>=30 && distancia <=39){ if(distancia!=30){ treinta(); y(); } if(distancia==30){ treinta(); cms(); } distancia=distancia-30; Serial.println(distancia); } if(distancia>=21 && distancia <=29){ distancia=distancia-20; veinti(); } if(distancia==20){ veinte(); cms(); } if(distancia==19){ diecinueve(); cms(); } if(distancia==18){ dieciocho(); cms(); } if(distancia==17){ diecisiete(); cms(); } if(distancia==16){ dieciseis(); cms(); } if(distancia==15){ quince(); cms(); } if(distancia==14){ catorce(); cms(); } if(distancia==13){ trece(); cms(); } if(distancia==12){ doce(); cms(); } if(distancia==11){ once(); cms(); } if(distancia==10){ diez(); cms(); } if(distancia==9){ nueve(); cms(); } if(distancia==8){ ocho(); cms(); } if(distancia==7){ siete(); cms(); } if(distancia==6){ seis(); cms(); } if(distancia==5){ cinco(); cms(); } if(distancia==4){ cuatro(); cms(); } if(distancia==3){ tres(); cms(); } if(distancia==2){ dos(); cms(); } if(distancia==1){ uno(); cms(); } //-----funciones---------------- } void uno(){ SdPlay.setFile("1.wav");//con setFile vamos a cargar el archivo que queremos reproducir SdPlay.play(); // play reproduciomos el archivo delay(500); } void dos(){ SdPlay.setFile("2.wav");//con setFile vamos a cargar el archivo que queremos reproducir SdPlay.play(); // play reproduciomos el archivo delay(500); } void tres(){ SdPlay.setFile("3.wav");//con setFile vamos a cargar el archivo que queremos reproducir SdPlay.play(); // play reproduciomos el archivo delay(500); } void cuatro(){ SdPlay.setFile("4.wav");//con setFile vamos a cargar el archivo que queremos reproducir SdPlay.play(); // play reproduciomos el archivo delay(500); } void cinco(){ SdPlay.setFile("5.wav");//con setFile vamos a cargar el archivo que queremos reproducir SdPlay.play(); // play reproduciomos el archivo delay(500); } void seis(){ SdPlay.setFile("6.wav");//con setFile vamos a cargar el archivo que queremos reproducir SdPlay.play(); // play reproduciomos el archivo delay(500); } void siete(){ SdPlay.setFile("7.wav");//con setFile vamos a cargar el archivo que queremos reproducir SdPlay.play(); // play reproduciomos el archivo delay(500); } void ocho(){ SdPlay.setFile("8.wav");//con setFile vamos a cargar el archivo que queremos reproducir SdPlay.play(); // play reproduciomos el archivo delay(500); } void nueve(){ SdPlay.setFile("9.wav");//con setFile vamos a cargar el archivo que queremos reproducir SdPlay.play(); // play reproduciomos el archivo delay(500); } void diez(){ SdPlay.setFile("10.wav");//con setFile vamos a cargar el archivo que queremos reproducir SdPlay.play(); // play reproduciomos el archivo delay(500); } void once(){ SdPlay.setFile("11.wav");//con setFile vamos a cargar el archivo que queremos reproducir SdPlay.play(); // play reproduciomos el archivo delay(500); } void doce(){ SdPlay.setFile("12.wav");//con setFile vamos a cargar el archivo que queremos reproducir SdPlay.play(); // play reproduciomos el archivo delay(500); } void trece(){ SdPlay.setFile("13.wav");//con setFile vamos a cargar el archivo que queremos reproducir SdPlay.play(); // play reproduciomos el archivo delay(500); } void catorce(){ SdPlay.setFile("14.wav");//con setFile vamos a cargar el archivo que queremos reproducir SdPlay.play(); // play reproduciomos el archivo delay(500); } void quince(){ SdPlay.setFile("15.wav");//con setFile vamos a cargar el archivo que queremos reproducir SdPlay.play(); // play reproduciomos el archivo delay(500); } void dieciseis(){ SdPlay.setFile("16.wav");//con setFile vamos a cargar el archivo que queremos reproducir SdPlay.play(); // play reproduciomos el archivo delay(700); } void diecisiete(){ SdPlay.setFile("17.wav");//con setFile vamos a cargar el archivo que queremos reproducir SdPlay.play(); // play reproduciomos el archivo delay(800); } void dieciocho(){ SdPlay.setFile("18.wav");//con setFile vamos a cargar el archivo que queremos reproducir SdPlay.play(); // play reproduciomos el archivo delay(700); } void diecinueve(){ SdPlay.setFile("19.wav");//con setFile vamos a cargar el archivo que queremos reproducir SdPlay.play(); // play reproduciomos el archivo delay(700); } void veinte(){ SdPlay.setFile("20.wav");//con setFile vamos a cargar el archivo que queremos reproducir SdPlay.play(); // play reproduciomos el archivo delay(500); } void treinta(){ SdPlay.setFile("30.wav");//con setFile vamos a cargar el archivo que queremos reproducir SdPlay.play(); // play reproduciomos el archivo delay(500); } void cuarenta(){ SdPlay.setFile("40.wav");//con setFile vamos a cargar el archivo que queremos reproducir SdPlay.play(); // play reproduciomos el archivo delay(500); } void cincuenta(){ SdPlay.setFile("50.wav");//con setFile vamos a cargar el archivo que queremos reproducir SdPlay.play(); // play reproduciomos el archivo delay(700); } void sesenta(){ SdPlay.setFile("60.wav");//con setFile vamos a cargar el archivo que queremos reproducir SdPlay.play(); // play reproduciomos el archivo delay(700); } void setenta(){ SdPlay.setFile("70.wav");//con setFile vamos a cargar el archivo que queremos reproducir SdPlay.play(); // play reproduciomos el archivo delay(700); } void ochenta(){ SdPlay.setFile("80.wav");//con setFile vamos a cargar el archivo que queremos reproducir SdPlay.play(); // play reproduciomos el archivo delay(700); } void noventa(){ SdPlay.setFile("90.wav");//con setFile vamos a cargar el archivo que queremos reproducir SdPlay.play(); // play reproduciomos el archivo delay(700); } void cien(){ SdPlay.setFile("cien.wav");//con setFile vamos a cargar el archivo que queremos reproducir SdPlay.play(); // play reproduciomos el archivo delay(500); } void doscientos(){ SdPlay.setFile("200.wav");//con setFile vamos a cargar el archivo que queremos reproducir SdPlay.play(); // play reproduciomos el archivo delay(700); } void trescientos(){ SdPlay.setFile("300.wav");//con setFile vamos a cargar el archivo que queremos reproducir SdPlay.play(); // play reproduciomos el archivo delay(700); } void uncentimetro(){ SdPlay.setFile("1cm.wav");//con setFile vamos a cargar el archivo que queremos reproducir SdPlay.play(); // play reproduciomos el archivo delay(700); } void ciento(){ SdPlay.setFile("ciento.wav");//con setFile vamos a cargar el archivo que queremos reproducir SdPlay.play(); // play reproduciomos el archivo delay(500); } void cms(){ SdPlay.setFile("cms.wav");//con setFile vamos a cargar el archivo que queremos reproducir SdPlay.play(); // play reproduciomos el archivo delay(600); } void veinti(){ SdPlay.setFile("veinti.wav");//con setFile vamos a cargar el archivo que queremos reproducir SdPlay.play(); // play reproduciomos el archivo delay(500); } void y(){ SdPlay.setFile("y.wav");//con setFile vamos a cargar el archivo que queremos reproducir SdPlay.play(); // play reproduciomos el archivo delay(500); } void rango(){ SdPlay.setFile("rango.wav");//con setFile vamos a cargar el archivo que queremos reproducir SdPlay.play(); // play reproduciomos el archivo delay(800); } void un(){ SdPlay.setFile("un.wav");//con setFile vamos a cargar el archivo que queremos reproducir SdPlay.play(); // play reproduciomos el archivo delay(500); } void tonoDistancia(){ digitalWrite(Trigger, LOW); delayMicroseconds(4); digitalWrite(Trigger, HIGH);//A través del pin de disparo (Trigger) enviaremos una señal de activación al sensor, lo activaremos durante 10 microsegundos y lo desactivaremos delayMicroseconds(10); digitalWrite(Trigger, LOW); duracion = pulseIn(eco, HIGH); //cent = duracion/58.2; //Calcula la distancia en centimetros basado en la velocidad del sonido. distancia = duracion * 10 / 292/ 2; //distancia=distancia*2; Serial.println(distancia);//Imprime ese valor en el puerto serial delay(10); if(distancia<=100){ SdPlay.setFile("tono.wav");//con setFile vamos a cargar el archivo que queremos reproducir SdPlay.play(); // play reproduciomos el archivo delay(distancia); SdPlay.stop(); } } |
Audio files
Remember that we must upload the audio files in wav format, to the micro sd card, in order to use this project. You can download them at the following link
If you want to use other audio files to change language or for a female vos for example, you must go to the next page, where we can select between different types of female and male voices and other languages, simply by typing a text (tts) and with any program that we have on our pc, we record the audio.
https://www.lumenvox.com/espanol/products/tts/
Now if we want to convert the files to the correct wav format this site will be of great help.
https://audio.online-convert.com/convert-to-wav

For the correct conversion we must go to “Optional settings” and under Modify resolution bits» choose 8 bit, in “Modify the sampling rate” 16000 Hz and in “Modify audio channels” we select stereo.
You may be interested in projects in Arduino, pic, robotics, telecommunications, subscribe http://www.youtube.com/user/carlosvolt?sub_confirmation=1 videos with full source code and diagrams
SUBSCRIBE TO OUR NEWSLETTERS, RECEIVE IN YOUR EMAIL THE MOST OUTSTANDING NEWS, JUST BY ENTERING YOUR EMAIL
[wysija_form id=”1″]
RECOMMENDED PROJECT